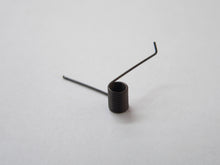
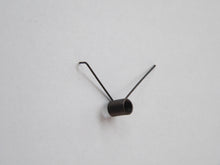
1873 Lever Safety Bar Replacement Spring by The Smith Shop
The spring that holds the Lever Safety Bar in place is rather stiff and very difficult to lighten. Here is a simple coil spring replacement that will give a light feel yet allow the Safety Bar to still function properly.
--
1873 Lever Safety Bar Replacement Spring The Smith Shop
Will also work on a Uberti 1866.
The spring that holds the Lever Safety Bar in place is rather stiff and very difficult to lighten. Here is a simple coil spring replacement that will give a light feel yet allow the Safety Bar to still function properly.
A light replacement spring which will reduce the pressure required to close the action that last quarter inch. The original spring is very strong and much to heavy. This spring will keep the trigger safety intact but eliminates you having to hold the lever closed under strong spring pressure to deactivate the safety. Some folks remove the original spring which is a safety issue and should not be done.
Warning: A competent gunsmith only should install these parts. All products are sold as is and without any warranty. No liability is expressed or implied for damage or injury which may result from the improper installation or use of these products.
|
Installation Instructions:First remove the trigger group from the rifle and remove the mainspring.Then remove the current flat Safety Spring. Re-install the screw that holds the trigger spring in place. Sometimes it will protrude thru the bottom of the tang. You can take some meat off so it is flush or add small washer to take the place of the removed flat spring
Next tap out the cross pin that holds the safety bar. See pix #1 Below.
Set the new coil spring in place to see if there is enough width for it to fit.
If so proceed to install. If not use a file to remove a little material (usually not more than .020" is needed) from the side of the safety finger where the spring will sit. See pix #3 Below where the pointer is pointing.
Install the new coil spring per the picture #4 and use a pin punch to keep it in line. See pix #4 Below.
Tap the cross pin back into place. Pix #5 Below
Check to see that it works and the leg of the spring engages enough of the safety. If not bend it in as necessary. Pix #6 Below.
|
||||||||||


